Create a bootable Windows installation USB drive on a Mac
This is a guide to create bootable Windows 10 or Windows 11 installation USB drive on a Mac. Normally I would use the Microsoft Media Creation Tool on a Windows PC, but at that time I only had access to my Macbook.
I first tried balenaEtcher which I normally use to create my Raspberry Pi SD cards and Linux installation drives, but this tool failed to read the downloaded Windows ISO file.
Download Windows 10 image
First of alle we need a up-to-date Windows ISO file. Microsoft provides an easy way to download the Windows ISO file.
For Windows 10 you can download the file on the official Windows 10 download site.
If you want to install Windows 11 you can find the ISO on the official Windows 11 download site.
Prepare USB drive
During the download the USB drive can already be prepared with the correct file system. Connect the USB drive to your Mac and open the Disk Utility program. In the tool select your USB device and click on "Erase". Name the device WININSTALL (the name will be used later) and select the FAT filesystem and Master boot record (MBR) partition schema.
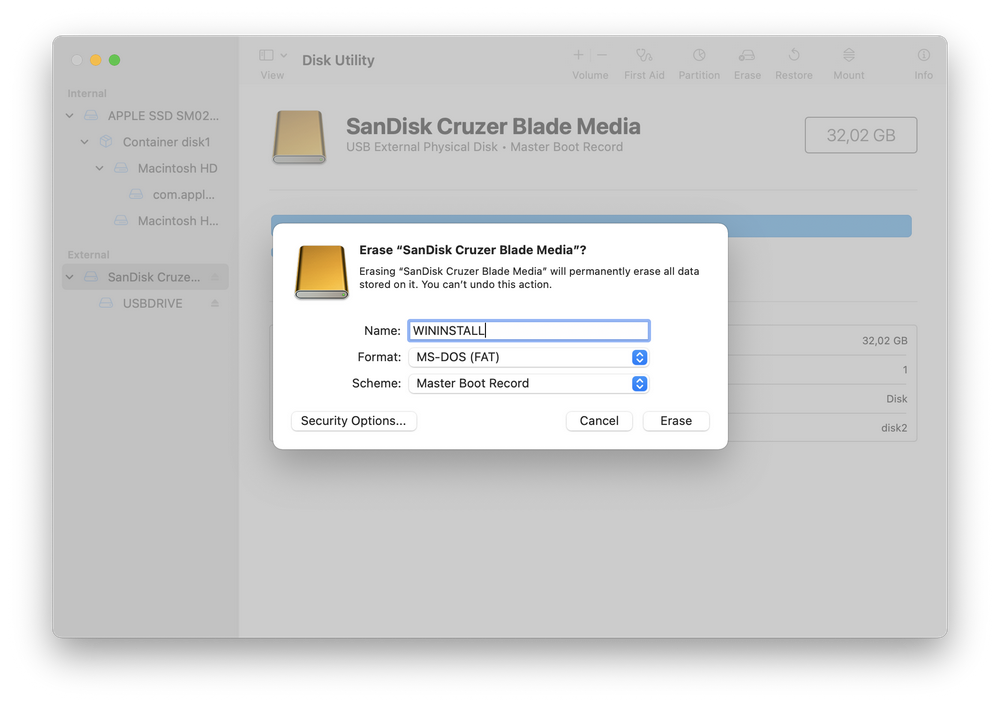 ⚠️ Keep in mind that all data of the USB device will be deleted!
Install homebrew
Now we need some utilities to modify the installation files. These can be downloaded by using the Homebrew package manager. If you haven't already installed homebrew on your Mac you can follow the instructions here.
Install wimlib
After the homebrew installation, it is just one command to install the wimlib tools.
brew install wimlibCopy all smaller files to the USB drive
After the download of the ISO is completed, copy all files except the install.wim to new formatted and connected USB drive. With the rsync command below this all happens at once. Please change the name of the mounted ISO file (in this example CCCOMA_X64FRE_DE-DE_DV9) to your version. It depends on the choosen version and language on the download page.
rsync -avh --progress --exclude=sources/install.wim /Volumes/CCCOMA_X64FRE_DE-DE_DV9/ /Volumes/WININSTALLSplit the install.wim file
Because of the 4GB file size limit of the FAT file system it is required to split the larger install.wim file into separate parts. This can be performed with the previously installed wimlib-imagex command. As with the rsync commmand, please change name name of the mounted ISO and USB drive to your values.
wimlib-imagex split /Volumes/CCCOMA_X64FRE_DE-DE_DV9/sources/install.wim /Volumes/WININSTALL/sources/install.swm 3500After the command finished successfully the drive can be removed and used to install Windows on a PC.